挣扎了两周,Spring security的cas终于搞出来了,废话不多说,开篇!
Spring boot集成Spring security
本篇是使用spring security集成cas,因此,先得集成spring security
新建一个Spring boot项目,加入maven依赖,我这里是用的架构是Spring boot2.0.4+Spring mvc+Spring data jpa+Spring security5
pom.xml:
1
2 <project xmlns=”http://maven.apache.org/POM/4.0.0“ xmlns:xsi=”http://www.w3.org/2001/XMLSchema-instance“
3 xsi:schemaLocation=”http://maven.apache.org/POM/4.0.0 http://maven.apache.org/xsd/maven-4.0.0.xsd">
44.0.0
5
6com.cas.client1
7cas-client1
80.0.1-SNAPSHOT
9jar
10
11cas-client1
12Demo project for Spring Boot
13
14
15org.springframework.boot
16spring-boot-starter-parent
172.0.4.RELEASE
18
19
20
21
22 <project.build.sourceEncoding>UTF-8</project.build.sourceEncoding>
23 <project.reporting.outputEncoding>UTF-8</project.reporting.outputEncoding>
24 <java.version>1.8</java.version>
25
26
27
28
29org.springframework.boot
30spring-boot-starter-web
31
32
33org.springframework.boot
34spring-boot-starter-thymeleaf
35
36
37
38org.springframework.boot
39spring-boot-starter-tomcat
40provided
41
42
43junit
44junit
454.12
46test
47
48
49org.springframework.boot
50spring-boot-starter-test
51test
52
53
54org.springframework.boot
55spring-boot-starter-security
56
57
58org.springframework.security
59spring-security-test
60test
61
62
63
64org.springframework.security
65spring-security-taglibs
66
67
68org.springframework.security.oauth
69spring-security-oauth2
70RELEASE
71
72
73org.springframework.boot
74spring-boot-starter-data-jpa
75
76
77org.springframework.boot
78spring-boot-starter-jdbc
79
80
81mysql
82mysql-connector-java
835.1.46
84
85
86
87com.alibaba
88druid-spring-boot-starter
891.1.10
90
91
92org.springframework.boot
93spring-boot
942.0.2.RELEASE
95compile
96
97
98
99
100
101
102org.springframework.boot
103spring-boot-maven-plugin
104
105
106
107
108
109**application.properties:
**1 server.port=8083
2 #静态文件访问存放地址
3 spring.resources.static-locations=classpath:/html/
4 # thymeleaf 模板存放地址
5 spring.thymeleaf.prefix=classpath:/html/
6 spring.thymeleaf.suffix=.html
7 spring.thymeleaf.mode=LEGACYHTML5
8 spring.thymeleaf.encoding=UTF-8
9
10 # JDBC 配置(驱动类自动从url的mysql识别,数据源类型自动识别) 11 # 或spring.datasource.url=
12 spring.datasource.druid.url=jdbc:mysql://localhost:3306/vhr?useUnicode=true&characterEncoding=UTF8
13 # 或spring.datasource.username=
14 spring.datasource.druid.username=root 15 # 或spring.datasource.password=
16 spring.datasource.druid.password=1234
17 #或 spring.datasource.driver-class-name=
18 #spring.datasource.druid.driver-class-name=com.mysql.jdbc.Driver 19
20 #连接池配置(通常来说,只需要修改initialSize、minIdle、maxActive 21 # 如果用Oracle,则把poolPreparedStatements配置为true,mysql可以配置为false。分库分表较多的数据库,建议配置为false。removeabandoned不建议在生产环境中打开如果用SQL Server,建议追加配置) 22 spring.datasource.druid.initial-size=1
23 spring.datasource.druid.max-active=20
24 spring.datasource.druid.min-idle=1
25 # 配置获取连接等待超时的时间 26 spring.datasource.druid.max-wait=60000
27 #打开PSCache,并且指定每个连接上PSCache的大小 28 spring.datasource.druid.pool-prepared-statements=true
29 spring.datasource.druid.max-pool-prepared-statement-per-connection-size=20
30 #spring.datasource.druid.max-open-prepared-statements=和上面的等价 31 spring.datasource.druid.validation-query=SELECT ‘x’
32 #spring.datasource.druid.validation-query-timeout=
33 spring.datasource.druid.test-on-borrow=false
34 spring.datasource.druid.test-on-return=false
35 spring.datasource.druid.test-while-idle=true
36 #配置间隔多久才进行一次检测,检测需要关闭的空闲连接,单位是毫秒 37 spring.datasource.druid.time-between-eviction-runs-millis=60000
38 #配置一个连接在池中最小生存的时间,单位是毫秒 39 spring.datasource.druid.min-evictable-idle-time-millis=300000
40 #spring.datasource.druid.max-evictable-idle-time-millis=
41 #配置多个英文逗号分隔 42 #spring.datasource.druid.filters= stat 43
44 # WebStatFilter配置,说明请参考Druid Wiki,配置_配置WebStatFilter 45 #是否启用StatFilter默认值true 46 spring.datasource.druid.web-stat-filter.enabled=true
47 spring.datasource.druid.web-stat-filter.url-pattern=/*
48 spring.datasource.druid.web-stat-filter.exclusions=*.js,*.gif,*.jpg,*.png,*.css,*.ico,/druid/* 49 spring.datasource.druid.web-stat-filter.session-stat-enable=false 50 spring.datasource.druid.web-stat-filter.session-stat-max-count=1000 51 spring.datasource.druid.web-stat-filter.principal-session-name=admin 52 spring.datasource.druid.web-stat-filter.principal-cookie-name=admin 53 spring.datasource.druid.web-stat-filter.profile-enable=true 54
55 # StatViewServlet配置 56 #展示Druid的统计信息,StatViewServlet的用途包括:1.提供监控信息展示的html页面2.提供监控信息的JSON API 57 #是否启用StatViewServlet默认值true 58 spring.datasource.druid.stat-view-servlet.enabled=true 59 spring.datasource.druid.stat-view-servlet.url-pattern=/druid/* 60
61
62 # JPA config 63 spring.jpa.database=mysql 64 spring.jpa.hibernate.ddl-auto=update 65 spring.jpa.show-sql=true 66 spring.jpa.generate-ddl=true 67 spring.jpa.properties.hibernate.dialect=org.hibernate.dialect.MySQL5Dialect 68 spring.jpa.open-in-view=true 69 # 解决jpa no session的问题 70 spring.jpa.properties.hibernate.enable_lazy_load_no_trans=true这里使用数据库存储角色权限信息,分三种实体:用户;角色;资源;用户对角色多对多;角色对资源多对多
创建几个实体类:
**用户**:这里直接使用用户持久化对象实现Spring security要求的UserDetails接口,并实现对应方法1 package com.cas.client1.entity; 2
3 import org.springframework.security.core.GrantedAuthority; 4 import org.springframework.security.core.userdetails.UserDetails; 5 import org.springframework.util.CollectionUtils; 6
7 import javax.persistence.*;
8 import java.util.ArrayList; 9 import java.util.Collection; 10 import java.util.List; 11
12 @Entity
13 @Table(name = “s_user”)
14 public class User implements UserDetails { 15 @Id
16 private String id; 17 @Column(name = “username”)
18 private String username; 19 @Column(name = “password”)
20 private String password; 21
22 @ManyToMany(fetch = FetchType.LAZY) 23 @JoinTable(
24 name = “s_user_role”,
25 joinColumns = @JoinColumn(name = “user_id”),
26 inverseJoinColumns = @JoinColumn(name = “role_id”)
27 )
28 private Listroles; 29
30 public User() { 31 }
32
33 public User(String id, String username, String password) { 34 this.id = id; 35 this.username = username; 36 this.password = password; 37 }
38
39 public String getId() { 40 return id; 41 }
42
43 public void setId(String id) { 44 this.id = id; 45 }
46
47 public ListgetRoles() { 48 return roles; 49 }
50
51 public void setRoles(Listroles) { 52 this.roles = roles; 53 }
54
55 @Override
56 public String getUsername() { 57 return username; 58 }
59
60 @Override
61 public boolean isAccountNonExpired() { 62 return true;
63 }
64
65 @Override
66 public boolean isAccountNonLocked() { 67 return true;
68 }
69
70 @Override
71 public boolean isCredentialsNonExpired() { 72 return true;
73 }
74
75 @Override
76 public boolean isEnabled() { 77 return true;
78 }
79
80 public void setUsername(String username) { 81 this.username = username; 82 }
83
84 @Transient
85 ListgrantedAuthorities=new ArrayList<>();
86 @Override
87 public Collection<? extends GrantedAuthority> getAuthorities() { 88 if (grantedAuthorities.size()==0){
89 if (!CollectionUtils.isEmpty(roles)){
90 for (Role role:roles){ 91 Listresources = role.getResources(); 92 if (!CollectionUtils.isEmpty(resources)){
93 for (Resource resource:resources){ 94 grantedAuthorities.add(new SimpleGrantedAuthority(resource.getResCode())); 95 }
96 }
97 }
98 }
99 grantedAuthorities.add(new SimpleGrantedAuthority(“AUTH_0”)); 100 } 101 return grantedAuthorities; 102 } 103 @Override 104 public String getPassword() { 105 return password; 106 } 107
108 public void setPassword(String password) { 109 this.password = password; 110 } 111 }注意看这里:
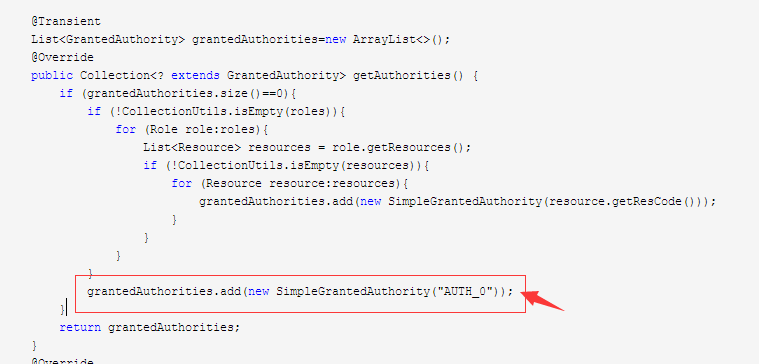
我给每一位登录的用户都授予了AUTH_0的权限,AUTH_0在下面的SecurityMetaDataSource里被关联的url为:/**,也就是说除开那些机密程度更高的,这个登录用户能访问所有资源
_角色:
_1 package com.cas.client1.entity; 2
3 import javax.persistence.*;
4 import java.util.List; 5
6 /**
7 * @author Administrator 8 */
9 @Entity 10 @Table(name = “s_role”) 11 public class Role { 12 @Id 13 @Column(name = “id”) 14 private String id; 15 @Column(name = “role_name”) 16 private String roleName; 17
18 @ManyToMany(fetch = FetchType.LAZY) 19 @JoinTable( 20 name = “s_role_res”, 21 joinColumns = @JoinColumn(name = “role_id”), 22 inverseJoinColumns = @JoinColumn(name = “res_id”) 23 ) 24 private Listresources; 25 @ManyToMany(fetch = FetchType.LAZY) 26 @JoinTable( 27 name = “s_user_role”, 28 joinColumns = @JoinColumn(name = “role_id”), 29 inverseJoinColumns = @JoinColumn(name = “user_id”) 30 ) 31 private List users; 32
33 public String getId() { 34 return id; 35 } 36
37 public void setId(String id) { 38 this.id = id; 39 } 40
41 public String getRoleName() { 42 return roleName; 43 } 44
45 public void setRoleName(String roleName) { 46 this.roleName = roleName; 47 } 48
49 public ListgetResources() { 50 return resources; 51 } 52
53 public void setResources(Listresources) { 54 this.resources = resources; 55 } 56
57 public ListgetUsers() { 58 return users; 59 } 60
61 public void setUsers(Listusers) { 62 this.users = users; 63 } 64 } 权限:
1 package com.cas.client1.entity; 2
3 import javax.persistence.Column; 4 import javax.persistence.Entity; 5 import javax.persistence.Id; 6 import javax.persistence.Table; 7
8 @Entity
9 @Table(name = “s_resource”) 10 public class Resource { 11 @Id 12 @Column(name = “id”) 13 private String id; 14 @Column(name = “res_name”) 15 private String resName; 16 @Column(name = “res_code”) 17 private String resCode; 18 @Column(name = “url”) 19 private String url; 20 @Column(name = “priority”) 21 private String priority; 22
23 public String getId() { 24 return id; 25 } 26
27 public void setId(String id) { 28 this.id = id; 29 } 30
31 public String getResName() { 32 return resName; 33 } 34
35 public void setResName(String resName) { 36 this.resName = resName; 37 } 38
39 public String getResCode() { 40 return resCode; 41 } 42
43 public void setResCode(String resCode) { 44 this.resCode = resCode; 45 } 46
47 public String getUrl() { 48 return url; 49 } 50
51 public void setUrl(String url) { 52 this.url = url; 53 } 54
55 public String getPriority() { 56 return priority; 57 } 58
59 public void setPriority(String priority) { 60 this.priority = priority; 61 } 62 }1 package com.cas.client1.dao; 2
3 import com.cas.client1.entity.User; 4 import org.springframework.data.jpa.repository.JpaRepository; 5 import org.springframework.data.jpa.repository.Query; 6 import org.springframework.data.repository.query.Param; 7 import org.springframework.stereotype.Repository; 8
9 import java.util.List; 10
11 @Repository 12 public interface UserDao extends JpaRepository<User,String> { 13 @Override 14 ListfindAll(); 15
16 ListfindByUsername(String username); 17
18 /**
19 * 根据用户名like查询 20 * @param username 21 * @return
22 */
23 ListgetUserByUsernameContains(String username); 24
25 @Query(“from User where id=:id”) 26 User getUserById(@Param(“id”) String id); 27
28 }ResourceDao:
1 package com.cas.client1.dao; 2
3 import com.cas.client1.entity.Resource; 4 import org.springframework.data.jpa.repository.JpaRepository; 5 import org.springframework.data.jpa.repository.Query; 6 import org.springframework.stereotype.Repository; 7
8 import java.util.List; 9
10 /**
11 * @author Administrator 12 */
13 @Repository 14 public interface ResourceDao extends JpaRepository<Resource,String> { 15
16 @Query(“from Resource order by priority”) 17 ListgetAllResource(); 18 } Service
UserService:1 package com.cas.client1.service; 2
3 import com.cas.client1.dao.UserDao; 4 import com.cas.client1.entity.User; 5 import org.springframework.beans.factory.annotation.Autowired; 6 import org.springframework.stereotype.Service; 7
8 import java.util.List; 9
10 @Service 11 public class UserService { 12 @Autowired 13 private UserDao userDao; 14
15 public User findByUsername(String username){ 16 Listlist = userDao.findByUsername(username); 17 return list!=null&&list.size()>0?list.get(0):null; 18 } 19 } ResourceService:
1 package com.cas.client1.service; 2
3 import com.cas.client1.dao.ResourceDao; 4 import com.cas.client1.entity.Resource; 5 import org.springframework.beans.factory.annotation.Autowired; 6 import org.springframework.stereotype.Service; 7
8 import java.util.List; 9
10 @Service 11 public class ResourceService { 12 @Autowired 13 private ResourceDao resourceDao; 14
15 public ListgetAll(){ 16 return resourceDao.getAllResource(); 17 } 18 } 创建_UserDetailsServiceImpl_,实现UserDetailsService接口,这个类是用以提供给Spring security从数据库加载用户信息的
1 package com.cas.client1.security; 2
3 import com.cas.client1.entity.User; 4 import com.cas.client1.service.UserService; 5 import org.springframework.beans.factory.annotation.Autowired; 6 import org.springframework.security.cas.authentication.CasAssertionAuthenticationToken; 7 import org.springframework.security.core.userdetails.AuthenticationUserDetailsService; 8 import org.springframework.security.core.userdetails.UserDetails; 9 import org.springframework.security.core.userdetails.UserDetailsService; 10 import org.springframework.security.core.userdetails.UsernameNotFoundException; 11 import org.springframework.stereotype.Component; 12
13 /**
14 * @author Administrator 15 */
16 @SuppressWarnings(“ALL”) 17 @Component 18 public class UserDetailsServiceImpl implements UserDetailsService{ 19 @Autowired 20 private UserService userService; 21 @Override 22 public UserDetails loadUserByUsername(String username) throws UsernameNotFoundException { 23 User user = userService.findByUsername(username); 24 return user; 25 } 26
27
28 }记得加@Component注解,以把实例交由Spring管理,或@Service,你们喜欢就好
创建SecurityMetaDataSource类
该类实现Spring security的FilterInvocationSecurityMetadataSource接口,作用是提供权限的元数据定义,并根据请求url匹配该url所需要的权限,获取权限后交由AccessDecisionManager的实现者裁定能否访问这个url,不能则会返回403的http错误码
SecurityMetaDataSource:1 package com.cas.client1.security; 2
3 import com.cas.client1.entity.Resource; 4 import com.cas.client1.service.ResourceService; 5 import org.springframework.beans.factory.annotation.Autowired; 6 import org.springframework.security.access.AccessDecisionManager; 7 import org.springframework.security.access.ConfigAttribute; 8 import org.springframework.security.access.SecurityConfig; 9 import org.springframework.security.access.intercept.AbstractSecurityInterceptor; 10 import org.springframework.security.web.FilterInvocation; 11 import org.springframework.security.web.access.intercept.FilterInvocationSecurityMetadataSource; 12 import org.springframework.security.web.util.matcher.AndRequestMatcher; 13 import org.springframework.security.web.util.matcher.AntPathRequestMatcher; 14 import org.springframework.security.web.util.matcher.RequestMatcher; 15 import org.springframework.stereotype.Component; 16
17 import javax.annotation.PostConstruct; 18 import java.util.*; 19
20 @Component 21 public class SecurityMetaDataSource implements FilterInvocationSecurityMetadataSource { 22
23 @Autowired 24 private ResourceService resourceService; 25
26 private LinkedHashMap<String,Collection> metaData; 27 @PostConstruct 28 private void loadSecurityMetaData(){ 29 List list = resourceService.getAll(); 30 metaData=new LinkedHashMap<>(); 31 for (Resource resource:list){ 32 List attributes=new ArrayList<>(); 33 attributes.add(new SecurityConfig(resource.getResCode())); 34 metaData.put(resource.getUrl(),attributes); 35 } 36 List base=new ArrayList<>(); 37 base.add(new SecurityConfig(“AUTH_0”)); 38 metaData.put(“/**“,base); 39 } 40
41 @Override 42 public CollectiongetAttributes(Object object) throws IllegalArgumentException { 43 FilterInvocation invocation= (FilterInvocation) object; 44 if (metaData==null){ 45 return new ArrayList<>(0); 46 } 47 String requestUrl = invocation.getRequestUrl(); 48 System.out.println(“请求Url:”+requestUrl); 49 Iterator<Map.Entry<String, Collection >> iterator = metaData.entrySet().iterator(); 50 Collection rs=new ArrayList<>(); 51 while (iterator.hasNext()){ 52 Map.Entry<String, Collection > next = iterator.next(); 53 String url = next.getKey(); 54 Collection value = next.getValue(); 55 RequestMatcher requestMatcher=new AntPathRequestMatcher(url); 56 if (requestMatcher.matches(invocation.getRequest())){ 57 rs = value; 58 break; 59 } 60 } 61 System.out.println(“拦截认证权限为:”+rs); 62 return rs; 63 } 64
65 @Override 66 public CollectiongetAllConfigAttributes() { 67 System.out.println(“invoke getAllConfigAttributes “); 68 //loadSecurityMetaData(); 69 //System.out.println(“初始化元数据”); 70 Collection<Collection > values = metaData.values(); 71 Collection all=new ArrayList<>(); 72 for (Collection each:values){ 73 each.forEach(configAttribute -> { 74 all.add(configAttribute); 75 }); 76 } 77 return all; 78 } 79
80 @Override 81 public boolean supports(Class<?> clazz) { 82 return true; 83 } 84 }同理:记得加上@Component注解
重头戏来了!Spring security的配置
创建SpringSecurityConfig类
该类继承于WebSecurityConfigurerAdapter,核心的配置类,在这里定义Spring security的使用方式SpringSecurityConfig
1 package com.cas.client1.security; 2
3 import com.cas.client1.config.CasProperties; 4 import org.springframework.beans.factory.annotation.Autowired; 5 import org.springframework.context.annotation.Bean; 6 import org.springframework.context.annotation.Configuration; 7 import org.springframework.security.access.AccessDecisionManager; 8 import org.springframework.security.access.AccessDecisionVoter; 9 import org.springframework.security.access.vote.AffirmativeBased; 10 import org.springframework.security.access.vote.RoleVoter; 11 import org.springframework.security.authentication.AuthenticationManager; 12 import org.springframework.security.config.annotation.authentication.builders.AuthenticationManagerBuilder; 13 import org.springframework.security.config.annotation.web.builders.HttpSecurity; 14 import org.springframework.security.config.annotation.web.builders.WebSecurity; 15 import org.springframework.security.config.annotation.web.configuration.EnableWebSecurity; 16 import org.springframework.security.config.annotation.web.configuration.WebSecurityConfigurerAdapter; 17 import org.springframework.security.crypto.bcrypt.BCryptPasswordEncoder; 18 import org.springframework.security.web.access.intercept.FilterSecurityInterceptor; 19
20 import java.util.ArrayList; 21 import java.util.List; 22
23 /**
24 * Spring security配置
25 * @author youyp 26 * @date 2018-8-10
27 */
28 @SuppressWarnings(“ALL”)
29 @Configuration
30 @EnableWebSecurity
31 public class SpringSecurityConfig extends WebSecurityConfigurerAdapter { 32 @Autowired
33 private UserDetailsServiceImpl userDetailsService; 34
35 @Autowired
36 private SecurityMetaDataSource securityMetaDataSource; 37
38 @Override
39 protected void configure(AuthenticationManagerBuilder auth) throws Exception { 40 super.configure(auth);
41 }
42
43 @Override
44 public void configure(WebSecurity web) throws Exception { 45 web.ignoring().antMatchers(“/js/**“,”/css/**“,”/img/**“,”/*.ico”,”/login.html”,
46 “/error”,”/login.do”);
47 }
48
49 @Override
50 protected void configure(HttpSecurity http) throws Exception { 51 System.out.println(“配置Spring security”);
52 http.formLogin()
53 //指定登录页是”/login”
54 .loginPage(“/login.html”).permitAll()
55 .loginProcessingUrl(“/login.do”).permitAll()
56 .defaultSuccessUrl(“/home”,true)
57 .permitAll()
58 //登录成功后可使用loginSuccessHandler()存储用户信息,可选。
59 //.successHandler(loginSuccessHandler()).permitAll()
60 .and()
61 .logout().permitAll()
62 .invalidateHttpSession(true)
63 .and()
64 //登录后记住用户,下次自动登录,数据库中必须存在名为persistent_logins的表
65 .rememberMe()
66 .tokenValiditySeconds(1209600)
67 .and()
68 .csrf().disable()
69 //其他所有资源都需要认证,登陆后访问
70 .authorizeRequests().anyRequest().fullyAuthenticated();
71
72 http.addFilterBefore(filterSecurityInterceptor(),FilterSecurityInterceptor.class);
73 }
74
75 /**
76 * 注意:这里不能加@Bean注解
77 * @return
78 * @throws Exception 79 */
80 //@Bean
81 public FilterSecurityInterceptor filterSecurityInterceptor() throws Exception { 82 FilterSecurityInterceptor filterSecurityInterceptor=new FilterSecurityInterceptor(); 83 filterSecurityInterceptor.setSecurityMetadataSource(securityMetaDataSource);
84 filterSecurityInterceptor.setAuthenticationManager(authenticationManager());
85 filterSecurityInterceptor.setAccessDecisionManager(affirmativeBased());
86 return filterSecurityInterceptor; 87 }
88
89
90 /**
91 * 重写AuthenticationManager获取的方法并且定义为Bean
92 * @return
93 * @throws Exception 94 */
95 @Override
96 @Bean
97 public AuthenticationManager authenticationManagerBean() throws Exception { 98 return super.authenticationManagerBean();
99 } 100
101 @Autowired 102 public void configureGlobal(AuthenticationManagerBuilder auth) throws Exception { 103 //指定密码加密所使用的加密器为passwordEncoder() 104 //需要将密码加密后写入数据库
105 auth.userDetailsService(userDetailsService).passwordEncoder(passwordEncoder()); 106 auth.eraseCredentials(false); 107 } 108
109 @Bean 110 public BCryptPasswordEncoder passwordEncoder() { 111
112 return new BCryptPasswordEncoder(4); 113 } 114
115
116 /**
117 * 定义决策管理器,这里可直接使用内置的AffirmativeBased选举器, 118 * 如果需要,可自定义,继承AbstractAccessDecisionManager,实现decide方法即可 119 * @return
120 */
121 @Bean 122 public AccessDecisionManager affirmativeBased(){ 123 List<AccessDecisionVoter<? extends Object>> voters=new ArrayList<>(); 124 voters.add(roleVoter()); 125 System.out.println(“正在创建决策管理器”); 126 return new AffirmativeBased(voters); 127 } 128
129 /**
130 * 定义选举器 131 * @return
132 */
133 @Bean 134 public RoleVoter roleVoter(){ 135 //这里使用角色选举器
136 RoleVoter voter=new RoleVoter(); 137 System.out.println(“正在创建选举器”); 138 voter.setRolePrefix(“AUTH_“); 139 System.out.println(“已将角色选举器的前缀修改为AUTH_“); 140 return voter; 141 } 142
143 }说一个注意点:
FilterSecurityInterceptor这个过滤器最为重要,它负责数据库权限信息加载,权限鉴定等关键动作,这个过滤器位于SpringSecurityFilterChain,即Spring security的过滤器链中,如果将这个类在配置类中加了@Bean注解,那么它将直接加入web容器的过滤器链中,这个链是首层过滤器链,
进入这个过滤器链之后才会进入SpringSecurityFilterChain这个负责安全的链条,如果这个跑到外层去了,就会导致这个独有的过滤器一直在生效,请求无限被拦截重定向,因为这个过滤器前面没有别的过滤器阻止它生效,如果它位于SpringSecurityFilterChain中,在进入FilterSecurityInterceptor这个
过滤器之前会有很多的Spring security过滤器在生效,如果不满足前面的过滤器的条件,不会进入到这个过滤器。也就是说,要进入到这个过滤器,必须要从SpringSecurityFilterChain进入,从其他地方进入都会导致请求被无限重定向另外
FilterSecurityInterceptor这个类继承于AbstractSecurityInterceptor并实现Filter接口,由此我们可以重写该类,自定义我们的特殊业务,但是,个人觉得FilterSecurityInterceptor这个实现类已经很完整地实现了这个过滤器应做的工作,没有必要重写
类似的,还有AccessDecisionManager这个“决策者”,Spring security为这个功能提供了几个默认的实现者,如AffirmativeBased这个类,是一个基于投票的决策器,投票器(Voter)要求实现AccessDecisionVoter接口,Spring security已为我们提供了几个很有用的投票器如RoleVoter,WebExpressionVoter
这些我们都没有必要去自定义,而且自定义出来的也没有默认实现拓展性和稳定性更好再定义一个登陆的Controller
LoginController1 package com.cas.client2.casclient2.controller; 2
3 import org.springframework.beans.factory.annotation.Autowired; 4 import org.springframework.security.authentication.AuthenticationManager; 5 import org.springframework.security.authentication.UsernamePasswordAuthenticationToken; 6 import org.springframework.security.cas.authentication.CasAuthenticationToken; 7 import org.springframework.security.cas.web.CasAuthenticationFilter; 8 import org.springframework.security.core.Authentication; 9 import org.springframework.security.core.context.SecurityContextHolder; 10 import org.springframework.stereotype.Controller; 11 import org.springframework.web.bind.annotation.RequestMapping; 12
13 import javax.servlet.http.HttpSession; 14
15 @SuppressWarnings(“ALL”) 16 @Controller 17 public class LoginController { 18 @Autowired 19 private AuthenticationManager authenticationManager; 20
21 /**
22 * 自定义登录地址 23 * @param username 24 * @param password 25 * @param session 26 * @return
27 */
28 @RequestMapping(“login.do”) 29 public String login(String username,String passwod, HttpSession session){ 30 try { 31 System.out.println(“进入登录请求……….”); 32 UsernamePasswordAuthenticationToken token=new UsernamePasswordAuthenticationToken(username,passwod); 33
34 Authentication authentication=authenticationManager.authenticate(token); 35 SecurityContextHolder.getContext().setAuthentication(authentication); 36 session.setAttribute(“SPRING_SECURITY_CONTEXT”, SecurityContextHolder.getContext()); 37 System.out.println(“登录成功”); 38 return “redirect:home.html”; 39 }catch (Exception e){ 40 e.printStackTrace(); 41 return “login.html”; 42 } 43
44 } 45 }创建几个页面:在resources下创建文件夹html,用于存放html静态文件,
home.html1
2 <html lang=“en”>
3 <head>
4 <meta charset=“UTF-8”>
5 <title>HOME</title>
6 </head>
7 <body>
8 <h1>welcome to Home</h1>
9 <button onclick=“javascript:location.href=’/logout’”>退出</button>
10 </body>
11 </html>login.html
1
2 <html lang=“en” xmlns=“http://www.w3.org/1999/xhtml“ xmlns:th=“http://www.thymeleaf.org“
3 xmlns:sec=“http://www.thymeleaf.org/thymeleaf-extras-springsecurity3"\>
4 <head>
5 <meta charset=“UTF-8”>
6 <title>登录</title>
7 </head>
8
9 <body>
10 <span style=“color: red” id=“msg”></span>
11 <form action=“/login.do” method=“post”>
12 <div><label> User Name : <input type=“text” name=“username”/> </label></div>
13 <div><label> Password: <input type=“password” name=“password”/> </label></div>
14 <div><input type=“submit” value=“Sign In”/></div>
15 <input type=“checkbox” name=“remember-me” value=“true” th:checked=“checked”/><p>Remember me</p>
16 </form>
17
18 </body>
19 <script type=“text/javascript”>
20 var url=location.href 21 var param=url.split(“?”)[1]; 22 console.log(param); 23 if (param){ 24 var p=param.split(“&”); 25 var msg=p[0].split(“=“)[1]; 26 document.getElementById(“msg”).innerHTML=msg; 27 } 28 </script>
29 </html>admin.html
再定义几个错误页面
在html文件夹下创建一个error文件夹,在error文件夹中创建403.html,404.html,500.html;在程序遇到这些错误码时,会自动跳转到对应的页面先启动一下项目,让spring-data-jpa反向生成一下表结构
再往数据库插入几条数据:
用户表的密码需要放密文,我们把我们的明文密码使用我们的密码encoder转一下:BCryptPasswordEncoder.encode(“123”);得到密文后存到数据库的password字段中
用户表:
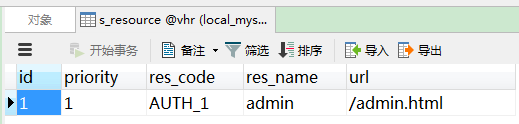
资源表:即权限信息表
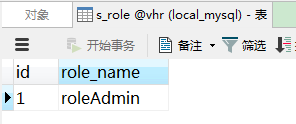
角色表:
角色权限中间表:
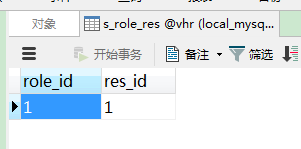
我们先不给用户配置角色,现在是空角色
启动Spring boot启动类,访问localhost:8083,检测到没登录会自动跳到登录页面,登录后自动跳转到home.html
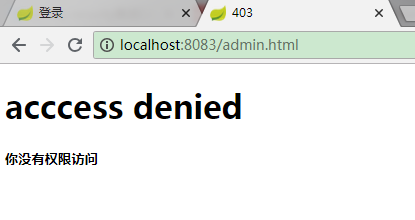
访问admin.html,返回403页面,当前用户无权限访问
再将刚刚的角色分配给用户,再次访问
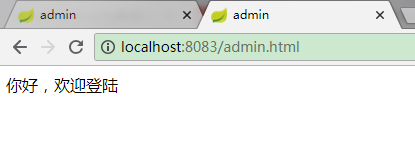
此时便可访问,大功告成!
部署CAS server
cas全称 Central Authentication Service,翻译为:中央认证服务;从名字我们便可得知,这是一个独立的服务,主要负责用户登录凭证的验证;事实也是如此,cas有认证中心和client端,认证中心就是我们的cas server,负责用户凭证的验证,需要独立部署,cas client就是我们的各个相互信任的应用
我们从cas官网下载源码,从moudle中找到一个.war后缀的文件,将这个文件拷出来,
改一下文件名为:cas,放到一个Tomcat中,启动tomcat,(端口先改一下,如8081),在浏览器中访问localhost:8081/cas即可看到cas的登录界面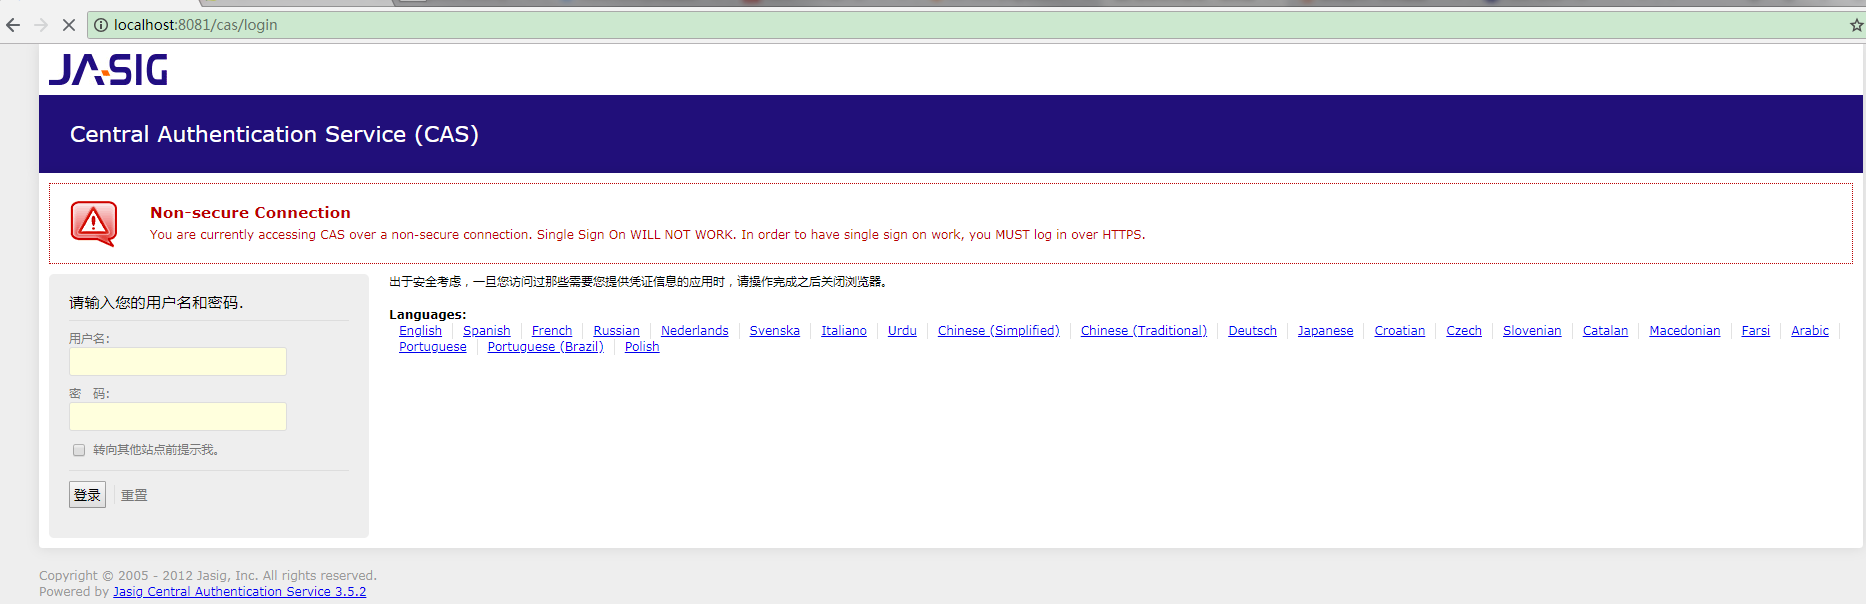
报了个警告,说我们没有配置ssl,也就是需要配置https,不过可以不用配置,
我们可以配置使用http:设置cas server使用http非安全协议
主要有以下步骤:
1.WEB-INF/deployerConfigContext.xml中在< bean class = _”org.jasig.cas.authentication.handler.support.HttpBasedServiceCredentialsAuthenticationHandler”_ p:httpClient-ref = _”httpClient”_ />增加参数 p:requireSecure=”false” ,是否需要安全验证,即 HTTPS,false 为不采用 如下:< bean class = _”org.jasig.cas.authentication.handler.support.HttpBasedServiceCredentialsAuthenticationHandler”_ p:httpClient-ref = _”httpClient”_ **p:requireSecure= “false”** />
1. WEB-INF/spring-configuration/ticketGrantingTicketCookieGenerator.xml中将p:cookieSecure=”true”修改为 p:cookieSecure=”false”
2. WEB-INF/spring-configuration/warnCookieGenerator.xml中将p:cookieSecure=”true”改为p:cookieSecure=”false”
3. 在tomcat的server.xml中关闭8443端口,如下图

配置CAS client
在之前Spring security的基础上,我们加入cas认证
在pom.xml中加入依赖包:1
2 <dependency>
3 <groupId>org.springframework.security</groupId>
4 <artifactId>spring-security-cas</artifactId>
5 </dependency>修改一下我们的UserDetailsServiceImpl类,让它实现AuthenticationUserDetailsService
接口
UserDetailsServiceImpl:1 package com.cas.client1.security; 2
3 import com.cas.client1.entity.User; 4 import com.cas.client1.service.UserService; 5 import org.springframework.beans.factory.annotation.Autowired; 6 import org.springframework.security.cas.authentication.CasAssertionAuthenticationToken; 7 import org.springframework.security.core.userdetails.AuthenticationUserDetailsService; 8 import org.springframework.security.core.userdetails.UserDetails; 9 import org.springframework.security.core.userdetails.UserDetailsService; 10 import org.springframework.security.core.userdetails.UsernameNotFoundException; 11 import org.springframework.stereotype.Component; 12
13 /**
14 * @author Administrator 15 */
16 @SuppressWarnings(“ALL”) 17 @Component 18 public class UserDetailsServiceImpl implements UserDetailsService, 19 AuthenticationUserDetailsService{ 20 @Autowired 21 private UserService userService; 22 @Override 23 public UserDetails loadUserByUsername(String username) throws UsernameNotFoundException { 24 User user = userService.findByUsername(username); 25 return user; 26 } 27
28 /**
29 * 实现AuthenticationUserDetailsService的方法, 30 * 用于获取cas server返回的用户信息,再根据用户关键信息加载出用户在当前系统的权限 31 * @param token 32 * @return
33 * @throws UsernameNotFoundException 34 */
35 @Override 36 public UserDetails loadUserDetails(CasAssertionAuthenticationToken token) throws UsernameNotFoundException { 37 String name = token.getName(); 38 System.out.println(“获得的用户名:”+name); 39 User user = userService.findByUsername(name); 40 if (user==null){ 41 throw new UsernameNotFoundException(name+”不存在”); 42 } 43 return user; 44 } 45 }在application.properties文件中加上以下内容:
1 # cas服务器地址
2 cas.server.host.url=http://localhost:8081/cas
3 # cas服务器登录地址
4 cas.server.host.login_url=${cas.server.host.url}/login
5 # cas服务器登出地址
6 cas.server.host.logout_url=${cas.server.host.url}/logout?service=${app.server.host.url}
7 # 应用访问地址
8 app.server.host.url=http://localhost:8083
9 # 应用登录地址 10 app.login.url=/login.do
11 # 应用登出地址 12 app.logout.url=/logout新增一个配置实体类
CasProperties
package com.cas.client1.config; import org.springframework.beans.factory.annotation.Value; import org.springframework.stereotype.Component;
@Component public class CasProperties {
@Value(“${cas.server.host.url}”) private String casServerUrl;
@Value(“${cas.server.host.login_url}”) private String casServerLoginUrl;
@Value(“${cas.server.host.logout_url}”) private String casServerLogoutUrl;
@Value(“${app.server.host.url}”) private String appServerUrl;
@Value(“${app.login.url}”) private String appLoginUrl;
@Value(“${app.logout.url}”) private String appLogoutUrl; /**get set方法略 */ }再修改一下我们的Spring security配置类
1 package com.cas.client1.security; 2
3 import com.cas.client1.config.CasProperties; 4 import org.jasig.cas.client.session.SingleSignOutFilter; 5 import org.jasig.cas.client.validation.Cas20ServiceTicketValidator; 6 import org.springframework.beans.factory.annotation.Autowired; 7 import org.springframework.context.annotation.Bean; 8 import org.springframework.context.annotation.Configuration; 9 import org.springframework.http.HttpMethod; 10 import org.springframework.security.access.AccessDecisionManager; 11 import org.springframework.security.access.AccessDecisionVoter; 12 import org.springframework.security.access.vote.AffirmativeBased; 13 import org.springframework.security.access.vote.RoleVoter; 14 import org.springframework.security.authentication.AuthenticationManager; 15 import org.springframework.security.cas.ServiceProperties; 16 import org.springframework.security.cas.authentication.CasAuthenticationProvider; 17 import org.springframework.security.cas.web.CasAuthenticationEntryPoint; 18 import org.springframework.security.cas.web.CasAuthenticationFilter; 19 import org.springframework.security.config.annotation.authentication.builders.AuthenticationManagerBuilder; 20 import org.springframework.security.config.annotation.web.builders.HttpSecurity; 21 import org.springframework.security.config.annotation.web.builders.WebSecurity; 22 import org.springframework.security.config.annotation.web.configuration.EnableWebSecurity; 23 import org.springframework.security.config.annotation.web.configuration.WebSecurityConfigurerAdapter; 24 import org.springframework.security.crypto.bcrypt.BCryptPasswordEncoder; 25 import org.springframework.security.web.access.intercept.FilterSecurityInterceptor; 26 import org.springframework.security.web.authentication.logout.LogoutFilter; 27 import org.springframework.security.web.authentication.logout.SecurityContextLogoutHandler; 28
29 import java.util.ArrayList; 30 import java.util.List; 31
32 /**
33 * Spring security配置
34 * @author youyp 35 * @date 2018-8-10
36 */
37 @SuppressWarnings(“ALL”)
38 @Configuration
39 @EnableWebSecurity
40 public class SpringSecurityConfig extends WebSecurityConfigurerAdapter { 41 @Autowired
42 private CasProperties casProperties; 43
44 @Autowired
45 private UserDetailsServiceImpl userDetailsService; 46
47 @Autowired
48 private SecurityMetaDataSource securityMetaDataSource; 49
50 @Override
51 protected void configure(AuthenticationManagerBuilder auth) throws Exception { 52 super.configure(auth);
53 auth.authenticationProvider(casAuthenticationProvider());
54 }
55
56 @Override
57 public void configure(WebSecurity web) throws Exception { 58 web.ignoring().antMatchers(“/js/**“,”/css/**“,”/img/**“,”/*.ico”,”/login.html”,
59 “/error”,”/login.do”);
60 //web.ignoring().antMatchers(“/js/**“,”/css/**“,”/img/**“,”/*.ico”,,”/home”);
61 //web.ignoring().antMatchers(“/**“);
62 // super.configure(web);
63
64 }
65
66 @Override
67 protected void configure(HttpSecurity http) throws Exception { 68 System.out.println(“配置Spring security”);
69 http.formLogin()
70 //指定登录页是”/login”
71 //.loginPage(“/login.html”).permitAll()
72 //.loginProcessingUrl(“/login.do”).permitAll()
73 //.defaultSuccessUrl(“/home”,true)
74 //.permitAll()
75 //登录成功后可使用loginSuccessHandler()存储用户信息,可选。
76 //.successHandler(loginSuccessHandler()).permitAll()
77 .and()
78 .logout().permitAll()
79 //退出登录后的默认网址是”/home”
80 //.logoutSuccessUrl(“/home.html”)
81 //.permitAll()
82 .invalidateHttpSession(true)
83 .and()
84 //登录后记住用户,下次自动登录,数据库中必须存在名为persistent_logins的表
85 .rememberMe()
86 .tokenValiditySeconds(1209600)
87 .and()
88 .csrf().disable()
89 //其他所有资源都需要认证,登陆后访问
90 .authorizeRequests().anyRequest().fullyAuthenticated();
91 http.exceptionHandling().authenticationEntryPoint(casAuthenticationEntryPoint())
92 .and()
93 .addFilterAt(casAuthenticationFilter(),CasAuthenticationFilter.class)
94 .addFilterBefore(casLogoutFilter(),LogoutFilter.class)
95 .addFilterBefore(singleSignOutFilter(),CasAuthenticationFilter.class);
96 /**
97 * FilterSecurityInterceptor本身属于过滤器,不能在外面定义为@Bean,
98 * 如果定义在外面,则这个过滤器会被独立加载到webContext中,导致请求会一直被这个过滤器拦截
99 * 加入到Springsecurity的过滤器链中,才会使它完整的生效 100 */
101 http.addFilterBefore(filterSecurityInterceptor(),FilterSecurityInterceptor.class); 102 } 103
104 /**
105 * 注意:这里不能加@Bean注解 106 * @return
107 * @throws Exception 108 */
109 // @Bean
110 public FilterSecurityInterceptor filterSecurityInterceptor() throws Exception { 111 FilterSecurityInterceptor filterSecurityInterceptor=new FilterSecurityInterceptor(); 112 filterSecurityInterceptor.setSecurityMetadataSource(securityMetaDataSource); 113 filterSecurityInterceptor.setAuthenticationManager(authenticationManager()); 114 filterSecurityInterceptor.setAccessDecisionManager(affirmativeBased()); 115 return filterSecurityInterceptor; 116 } 117
118 /**
119 * 认证入口 120 *121 * Note:浏览器访问不可直接填客户端的login请求,若如此则会返回Error页面,无法被此入口拦截 122 *
123 * @return
124 */
125 @Bean 126 public CasAuthenticationEntryPoint casAuthenticationEntryPoint(){ 127 CasAuthenticationEntryPoint casAuthenticationEntryPoint=new CasAuthenticationEntryPoint(); 128 casAuthenticationEntryPoint.setLoginUrl(casProperties.getCasServerLoginUrl()); 129 casAuthenticationEntryPoint.setServiceProperties(serviceProperties()); 130 return casAuthenticationEntryPoint; 131 } 132
133 @Bean 134 public ServiceProperties serviceProperties() { 135 ServiceProperties serviceProperties=new ServiceProperties(); 136 serviceProperties.setService(casProperties.getAppServerUrl()+casProperties.getAppLoginUrl()); 137 serviceProperties.setAuthenticateAllArtifacts(true); 138 return serviceProperties; 139 } 140
141 // @Bean
142 public CasAuthenticationFilter casAuthenticationFilter() throws Exception { 143 CasAuthenticationFilter casAuthenticationFilter=new CasAuthenticationFilter(); 144 casAuthenticationFilter.setAuthenticationManager(authenticationManager()); 145 casAuthenticationFilter.setFilterProcessesUrl(casProperties.getAppLoginUrl()); 146 // casAuthenticationFilter.setAuthenticationSuccessHandler( 147 // new SimpleUrlAuthenticationSuccessHandler(“/home.html”));
148 return casAuthenticationFilter; 149 } 150
151 @Bean 152 public CasAuthenticationProvider casAuthenticationProvider(){ 153 CasAuthenticationProvider casAuthenticationProvider=new CasAuthenticationProvider(); 154 casAuthenticationProvider.setAuthenticationUserDetailsService(userDetailsService); 155
156 casAuthenticationProvider.setServiceProperties(serviceProperties()); 157 casAuthenticationProvider.setTicketValidator(cas20ServiceTicketValidator()); 158 casAuthenticationProvider.setKey(“casAuthenticationProviderKey”); 159 return casAuthenticationProvider; 160 } 161
162 @Bean 163 public Cas20ServiceTicketValidator cas20ServiceTicketValidator() { 164 return new Cas20ServiceTicketValidator(casProperties.getCasServerUrl()); 165 } 166
167 // @Bean
168 public SingleSignOutFilter singleSignOutFilter(){ 169 SingleSignOutFilter singleSignOutFilter=new SingleSignOutFilter(); 170 singleSignOutFilter.setCasServerUrlPrefix(casProperties.getCasServerUrl()); 171 singleSignOutFilter.setIgnoreInitConfiguration(true); 172 return singleSignOutFilter; 173 } 174
175 // @Bean
176 public LogoutFilter casLogoutFilter(){ 177 LogoutFilter logoutFilter = new LogoutFilter(casProperties.getCasServerLogoutUrl(), new SecurityContextLogoutHandler()); 178 logoutFilter.setFilterProcessesUrl(casProperties.getAppLogoutUrl()); 179 return logoutFilter; 180 } 181
182 /**
183 * 重写AuthenticationManager获取的方法并且定义为Bean 184 * @return
185 * @throws Exception 186 */
187 @Override 188 @Bean 189 public AuthenticationManager authenticationManagerBean() throws Exception { 190 return super.authenticationManagerBean(); 191 } 192
193 @Autowired 194 public void configureGlobal(AuthenticationManagerBuilder auth) throws Exception { 195 //指定密码加密所使用的加密器为passwordEncoder() 196 //需要将密码加密后写入数据库 197 //auth.userDetailsService(userDetailsService).passwordEncoder(passwordEncoder()); 198 //auth.eraseCredentials(false);
199 } 200
201 @Bean 202 public BCryptPasswordEncoder passwordEncoder() { 203
204 return new BCryptPasswordEncoder(4); 205 } 206
207
208 /**
209 * 定义决策管理器,这里可直接使用内置的AffirmativeBased选举器, 210 * 如果需要,可自定义,继承AbstractAccessDecisionManager,实现decide方法即可 211 * @return
212 */
213 @Bean 214 public AccessDecisionManager affirmativeBased(){ 215 List<AccessDecisionVoter<? extends Object>> voters=new ArrayList<>(); 216 voters.add(roleVoter()); 217 System.out.println(“正在创建决策管理器”); 218 return new AffirmativeBased(voters); 219 } 220
221 /**
222 * 定义选举器 223 * @return
224 */
225 @Bean 226 public RoleVoter roleVoter(){ 227 //这里使用角色选举器
228 RoleVoter voter=new RoleVoter(); 229 System.out.println(“正在创建选举器”); 230 voter.setRolePrefix(“AUTH_“); 231 System.out.println(“已将角色选举器的前缀修改为AUTH_“); 232 return voter; 233 } 234
235
236 @Bean 237 public LoginSuccessHandler loginSuccessHandler() { 238 return new LoginSuccessHandler(); 239 } 240
241
242 }这里我们新增了几个filter,请注意,这几个filter定义时都不能配置@Bean注解,原因以上相同,这几个filter都要加入到springSecurity的FilterChain中,而不是直接加入到web容器的FilterChain中
再修改一下LoginController1 package com.cas.client1.controller; 2
3 import org.springframework.beans.factory.annotation.Autowired; 4 import org.springframework.security.authentication.AuthenticationManager; 5 import org.springframework.security.authentication.UsernamePasswordAuthenticationToken; 6 import org.springframework.security.cas.web.CasAuthenticationFilter; 7 import org.springframework.security.core.Authentication; 8 import org.springframework.security.core.context.SecurityContextHolder; 9 import org.springframework.security.web.authentication.UsernamePasswordAuthenticationFilter; 10 import org.springframework.stereotype.Controller; 11 import org.springframework.web.bind.annotation.RequestMapping; 12
13 import javax.servlet.http.HttpSession; 14
15 @SuppressWarnings(“Duplicates”) 16 @Controller 17 public class LoginController { 18 @Autowired 19 private AuthenticationManager authenticationManager; 20
21 /**
22 * 自定义登录地址 23 * @param username 24 * @param password 25 * @param session 26 * @return
27 */
28 @RequestMapping(“login.do”) 29 public String login(String ticket, HttpSession session){ 30 try { 31 System.out.println(“进入登录请求……….”); 32 //cas单点登录的用户名就是:_cas_stateful_ ,用户凭证是server传回来的ticket
33 String username = CasAuthenticationFilter.CAS_STATEFUL_IDENTIFIER; 34 UsernamePasswordAuthenticationToken token=new UsernamePasswordAuthenticationToken(username,ticket); 35 Authentication authentication=authenticationManager.authenticate(token); 36 SecurityContextHolder.getContext().setAuthentication(authentication); 37 session.setAttribute(“SPRING_SECURITY_CONTEXT”, SecurityContextHolder.getContext()); 38 System.out.println(“登录成功”); 39 return “redirect:home.html”; 40 }catch (Exception e){ 41 e.printStackTrace(); 42 return “login.html”; 43 } 44
45 } 46 }这时,之前负责登录的loginController不再是验证用户名和密码正不正确了,因为用户名密码的验证已经交给cas server了,LoginController的工作就是接收cas server重定向时传回来的ticket,验证ticket的有效性,如果没有异常,则会进入到UserDetailsServiceImpl中的loadUserDetails方法,并根据用户名加载用户权限等信息,然后我们再将用户信息存入Session,完成本地登录,本地登录之后,用户每次请求时,就不需要再次验证ticket了,而是验证Session
到这里,cas client已经配置完成,为了看清楚流程,我们以debug模式启动一下项目,在loginController的login方法开头打一个断点,打开浏览器调试模式(F12),切换到network看请求,在浏览器中输入:localhost:8083,浏览器会自动重定向到cas server 的登录页面,如下图:
我们输入一个数据库中有的用户名,再在密码栏中输入一次用户名,因为这里的cas server验证方式还没改,只要求用户名和密码相同就可通过验证,后面我会研究一下怎么修改cas server 的验证方式为数据库验证
如输入:用户名:user 密码:user
点击登录,验证成功后,我们看F12 network请求,发现浏览器发送了两个请求,一个是8081的,也就是cas server的,另外一个是8083的,也就是我们的client端的,如图: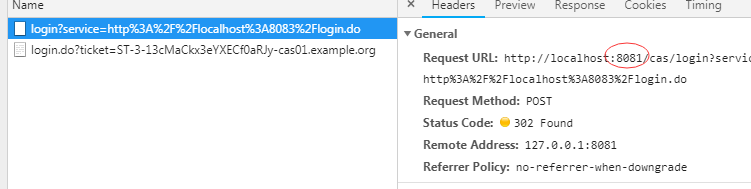
另一个
因为我们在后台开了debug模式,打了断点,所以后面这个请求一直在pending状态,我们先看第一个请求的详细情况:

很明显的,这个请求发送了我们的用户名和密码,由此可知,这个请求的作用就是负责在cas server后台验证用户名的密码,验证成功后,会自动重定向到第二个请求
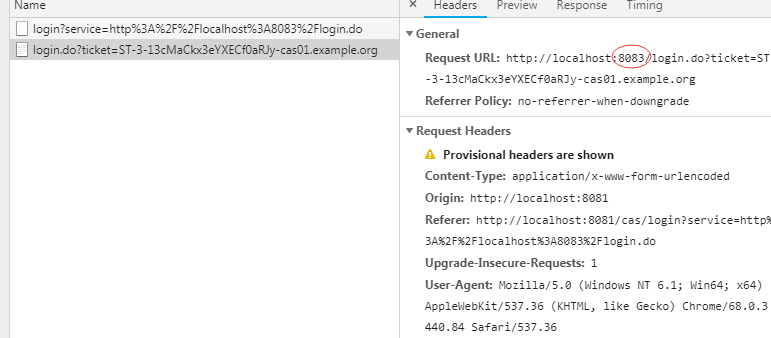
我们再来看第二个请求: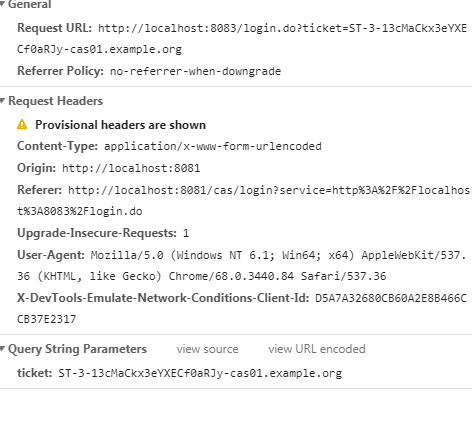
这个请求就是我们cas client所配置的登录地址,此时这个请求后面自动带上了一个名为ticket的参数,参数值是一串自动生成的随机字符串,由cas server生成的
我们再回到后台,没什么错误的话,我们可以看到LoginController接收到了这个参数,我们先在UserDetailsServiceImpl类的loadUserDetails方法的开头打一个断点,按F8让调试器跑走,此时,我们就可以看到调试器跳到了我们刚刚打的UserDetasServiceImpl的断点中,再看看参数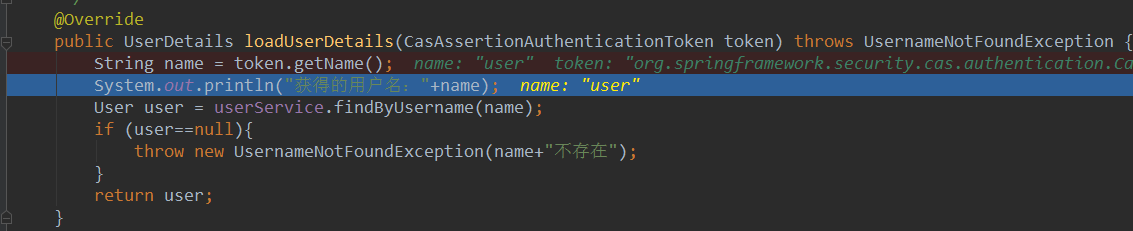
可以看出,我们接收到了cas server认证完ticket后传回来的用户名,我们根据用户名加载对应的权限,返回即可,此时我们再次按F8跳走
再回到界面,发现我们已经可以访问页面了: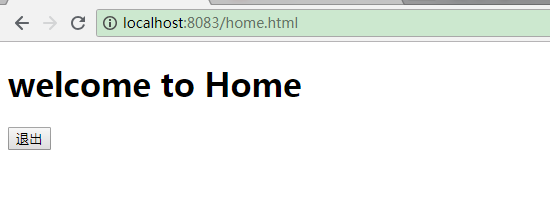
下一步,就是验证多个应用之间是否能只登陆一次就不用再登陆了;
我们将当前项目拷贝一份,改名称为cas-client2(maven的groupId和artifactId),再修改一下端口为8082, ,记得对应的cas配置也要改:
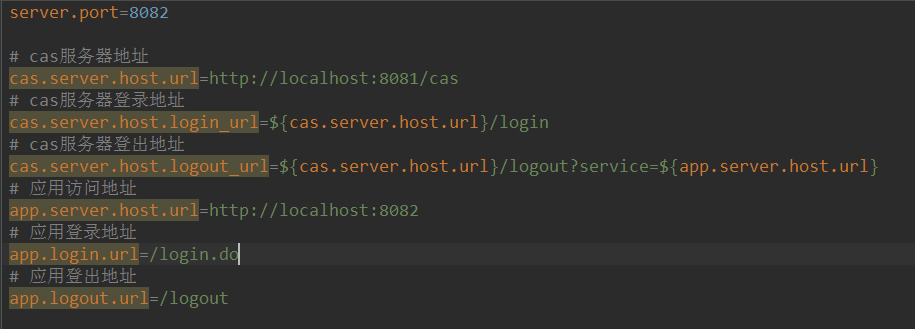
启动项目
先访问localhost:8082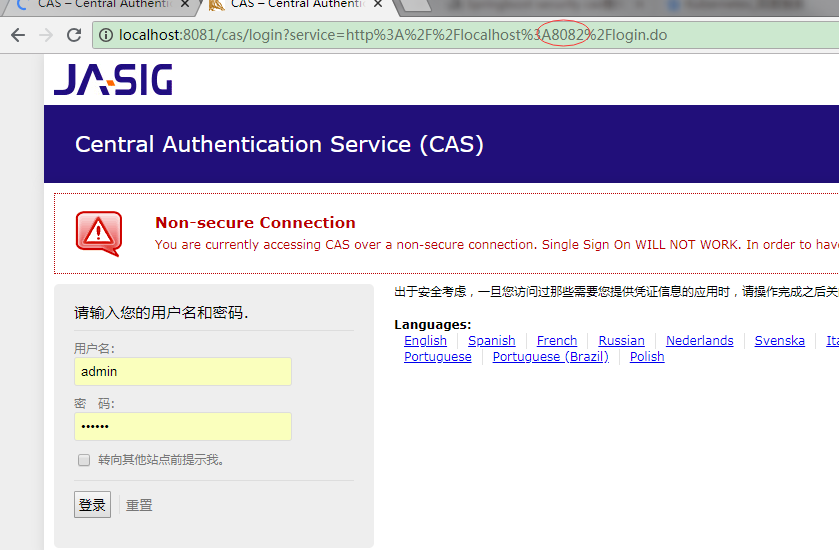
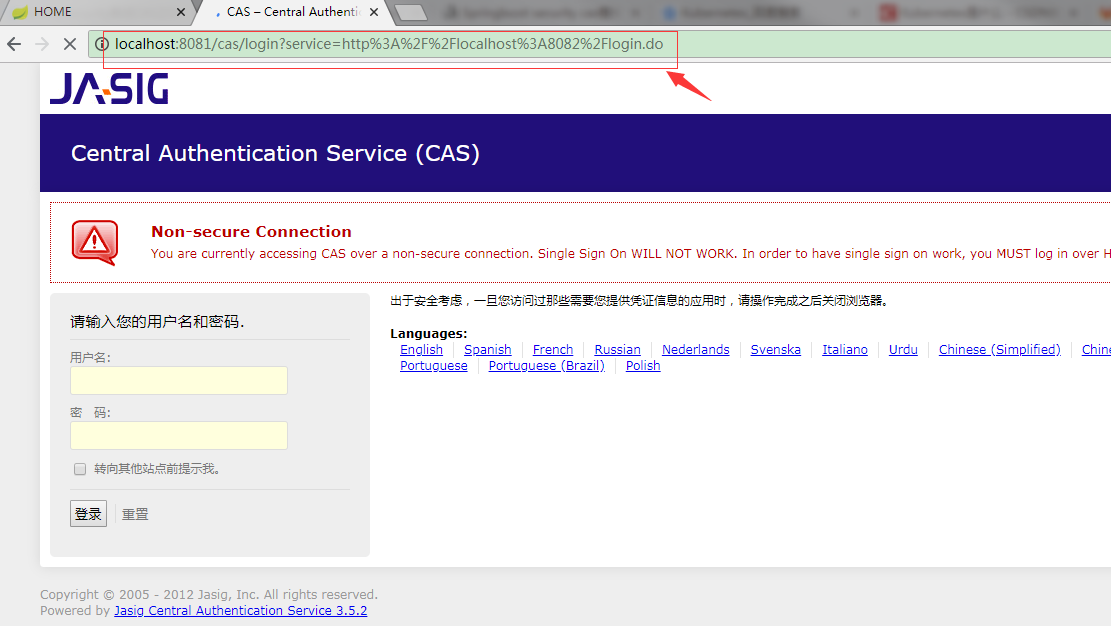
发现它自动跳转到了8081的cas server
再打开另外一个浏览器标签,访问localhost:8083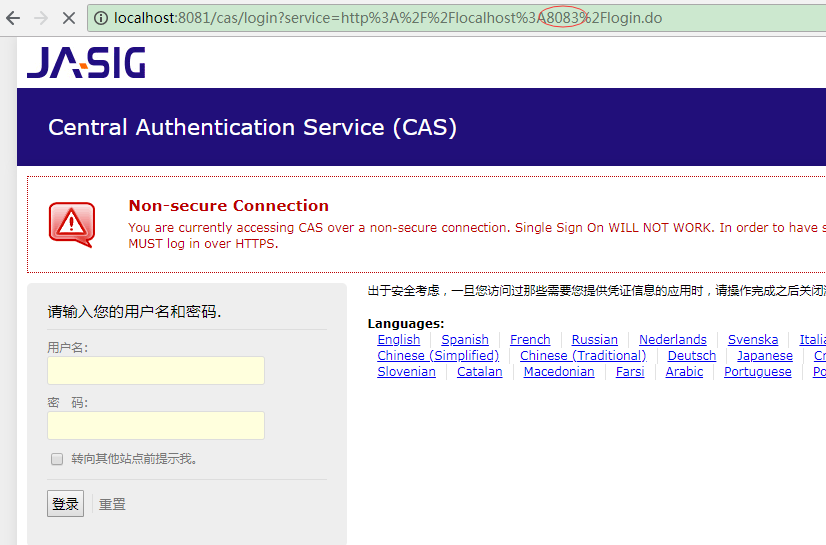
发现它也自动跳到了cas的登录页面,我们先在这里输入账号密码登录:
登录成功后,我们再切换回刚刚没登录的8082的网页标签,刷新一下,
ok,8082也不用登陆了,大功告成!
源码地址:
https://github.com/yupingyou/casclient.git
另:Spring security原本默认有个/login和/logout的handler,(以前不是这个地址,不知道从哪个版本开始改了,以前好像是_spring_security_check,大概是这个,记不太清,我用了4以后就发现地址变了),但是我发现我访问/login的时候出现404,但/logout可以访问,没发现什么原因,后来我就自定义一个登陆了,也就是我配置的/login.do,代替了默认的/login
第一次动手写这么长的博客……………累